How To Make Resin Cutting Board?9 Easy Step
Welcome to our guide on how to make a resin cutting board, a stunning and unique addition to your kitchen. Resin cutting boards have gained popularity due to their vibrant colors, glossy finish, and durability. Combining the beauty of resin with the functionality of a cutting board, this DIY project allows you to create a custom piece that reflects your personal style and adds a touch of elegance to your culinary space.
In this guide, we will take you through the step-by-step process of creating a resin cutting board, from selecting the right materials to pouring and curing the resin. You’ll discover the techniques to achieve captivating designs, such as incorporating pigments, dyes, or even natural elements like flowers or wood shavings into the resin.
How To Make Resin Cutting Board?
Creating a resin cutting board is a creative and rewarding DIY project. Here is a step-by-step guide on how to make a resin cutting board:
Materials Needed:
- Wood board (hardwood, such as maple or walnut, is recommended)
- Epoxy resin and hardener
- Mixing cups and stirring sticks
- Resin pigments or dyes (optional)
- Heat gun or butane torch
- Sandpaper or sanding block
- Protective gloves and safety goggles
- Plastic sheet or drop cloth
- Clamps (if needed)
Step 1: Prepare the Wood Board
- Choose a hardwood board of your desired size and shape for the cutting board.
- Ensure the board is clean, smooth, and free from any defects or rough edges.
- If necessary, sand the board using progressively finer grits of sandpaper or a sanding block to achieve a smooth surface.
Step 2: Protect the Work Area
- Cover your work surface with a plastic sheet or drop cloth to protect it from any spills or drips during the resin pouring process.
Step 3: Mix the Resin
- Follow the instructions provided by the manufacturer to mix the epoxy resin and hardener in the recommended ratio.
- Stir the mixture thoroughly, ensuring the resin and hardener are well combined.
Step 4: Add Pigments or Dyes (Optional)
- If desired, add resin pigments or dyes to the mixture to create custom colors or effects.
- Stir the pigments or dyes into the resin mixture until evenly distributed.
Step 5: Pour the Resin
- Slowly pour the resin mixture onto the prepared wood board, starting from the center and working towards the edges.
- Use a stirring stick or brush to spread the resin evenly over the surface, ensuring complete coverage.
- If using multiple colors or layers, pour and spread each layer before moving on to the next.
Step 6: Remove Air Bubbles
- Use a heat gun or butane torch to carefully pass over the surface of the resin to remove any air bubbles.
- Move the heat source in a sweeping motion about 6 to 8 inches above the resin surface, being careful not to overheat or scorch the resin.
Step 7: Allow the Resin to Cure
- Follow the manufacturer’s instructions regarding the curing time for the epoxy resin.
- Place the cutting board in a dust-free and well-ventilated area to allow the resin to cure completely. This process usually takes 24 to 48 hours.
Step 8: Sand and Finish
- Once the resin is fully cured, sand the edges and surface of the cutting board using progressively finer grits of sandpaper until smooth.
- Wipe away any dust or residue with a clean cloth.
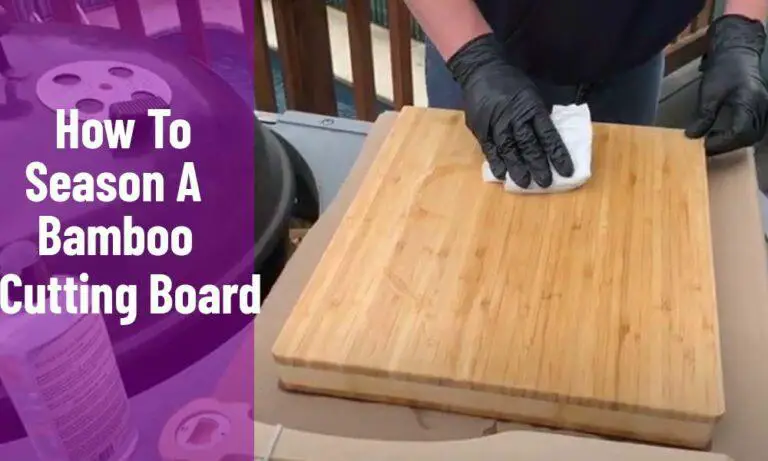
Step 9: Apply a Food-Safe Finish
- To protect the wood and the resin, apply a food-safe finish, such as a food-grade cutting board oil or beeswax, following the manufacturer’s instructions.
- Allow the finish to dry completely before using the cutting board.
By following these steps, you can create a stunning resin cutting board that showcases your creativity and adds a touch of elegance to your kitchen. Remember to prioritize safety by wearing protective gloves and goggles, working in a well-ventilated area, and carefully following the manufacturer’s instructions for the resin and finishing products. Enjoy the process and relish the satisfaction of crafting a functional and artistic cutting board.
Credit: resincraftsblog.com
Maintaining and caring for your resin cutting board?
Maintaining and caring for your resin cutting board is essential to preserve its beauty and functionality. Here are some tips on how to properly care for and maintain your resin cutting board:
- Cleaning:
- After each use, wash the resin cutting board with warm water and mild dish soap.
- Use a sponge or soft cloth to gently clean the surface, ensuring that any food residue or stains are removed.
- Avoid using abrasive cleaners or scrub brushes that may scratch or damage the resin.
- Avoid Heat and Direct Sunlight:
- Keep your resin cutting board away from direct heat sources, such as stovetops, ovens, or hot pans, as excessive heat can damage the resin.
- Avoid placing the cutting board in direct sunlight for extended periods, as this can cause the resin to fade or discolor over time.
- Use Cutting Board Safe Utensils:
- To prevent scratching or damaging the resin surface, use cutting board safe utensils, such as wooden or plastic cutting tools.
- Avoid using sharp knives with serrated edges or heavy-duty cleavers that can leave deep marks on the resin.
- Dry Thoroughly:
- After cleaning, thoroughly dry the resin cutting board with a clean towel or allow it to air dry completely before storing.
- Moisture can affect the integrity of the resin and may lead to warping or damage if not properly dried.
- Avoid Harsh Chemicals:
- Avoid using harsh chemicals, strong solvents, or abrasive cleaners on your resin cutting board, as they can damage the resin’s finish.
- Stick to mild dish soap and water for regular cleaning.
- Regular Maintenance:
- Over time, if the resin surface becomes dull or loses its shine, you can restore its luster by applying a food-safe resin polish or sealer. Follow the manufacturer’s instructions for application.
- If you notice any deep scratches or marks on the resin, you can gently sand the affected area using fine-grit sandpaper and then polish it to restore the smoothness.
- Storage:
- Store your resin cutting board in a cool, dry place away from direct sunlight.
- Avoid stacking heavy objects on top of the cutting board to prevent warping or damage.
By following these care and maintenance tips, you can ensure that your resin cutting board remains in excellent condition and continues to be a functional and beautiful addition to your kitchen. Regular cleaning and proper care will help prolong its lifespan and preserve its visual appeal.
Can you make a cutting board out of resin?
When it comes to cutting boards, wood is the most common material due to its durability and suitability for food preparation. However, resin has gained popularity as a decorative element in cutting board designs. But can you make a cutting board out of resin alone? Let’s explore the possibilities and considerations.
The Role of Resin: Resin is a versatile material that can add visual appeal and uniqueness to cutting boards. However, resin alone does not possess the necessary hardness and durability required for the cutting surface. It is not recommended to create a cutting board using resin as the primary material.
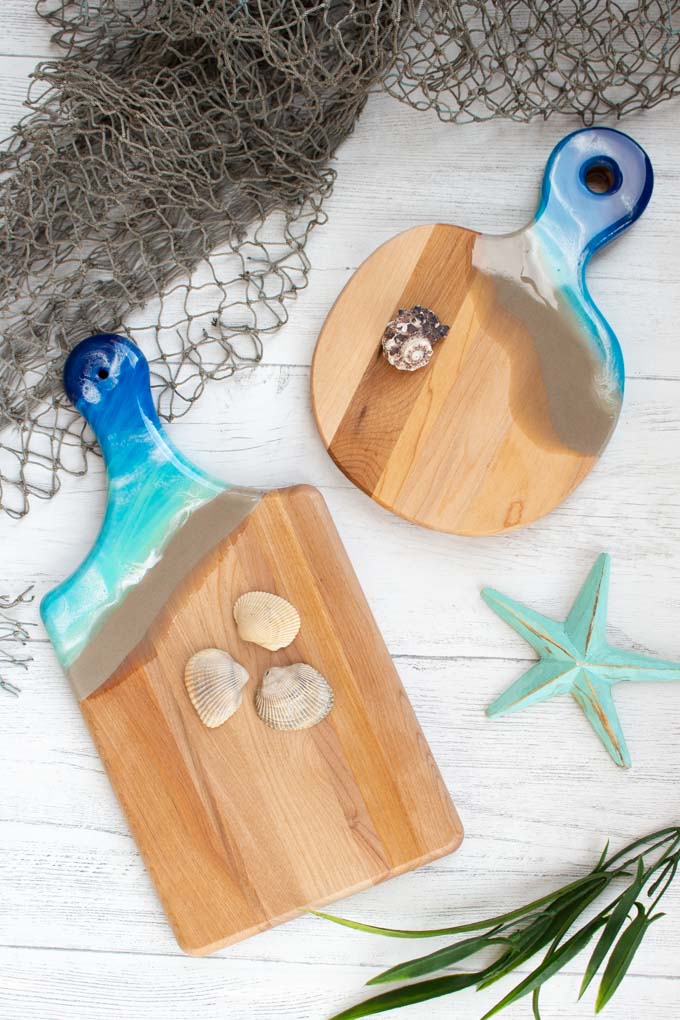
Incorporating Resin into Cutting Board Designs: While a cutting board made entirely of resin is not practical, resin can be incorporated into the design as an accent or decorative feature. One common method is to combine resin with a hardwood base, such as maple or walnut. The wood provides the necessary strength and functionality, while resin adds a touch of creativity and elegance.
Resin as a Decorative Element: Resin can be poured into grooves, gaps, or inlays in the wood, creating stunning patterns, vibrant colors, or even embedding decorative elements like flowers or wood shavings. This combination of wood and resin allows for endless design possibilities, resulting in unique and eye-catching cutting boards.
Safety Considerations: When using resin in cutting board designs, it is crucial to select food-safe resin and follow proper hygiene practices. Ensure that the wood used in the cutting board is food-grade and free from any toxic substances. It’s essential to maintain a smooth and sealed surface to prevent any food particles or bacteria from getting trapped.
Maintenance and Care: Resin-enhanced cutting boards require regular maintenance and care. Clean the board with mild soap and warm water, ensuring that no harsh chemicals are used that could damage the resin. Proper drying and storage are essential to prevent warping or damage to the wood.
Does epoxy resin make a good cutting board?
Epoxy resin can be used to create a visually appealing surface on a cutting board, but it is not recommended as the sole material for the cutting surface. Epoxy resin alone is not durable or hard enough to withstand the constant cutting and chopping involved in food preparation. However, when used properly, epoxy resin can enhance the appearance and durability of a cutting board.
When incorporating epoxy resin into a cutting board, it is typically poured over a solid and food-safe base material, such as hardwood. The epoxy resin provides a glossy, smooth, and protective layer that adds beauty and helps to seal the wood. It can also fill in any gaps or imperfections in the surface, making the cutting board easier to clean and maintain.
It is important to note that the epoxy resin used for a cutting board should be food-safe and certified for contact with food. Following proper safety guidelines and allowing the epoxy resin to cure fully before use is crucial to ensure it does not release any harmful substances.
In conclusion, while epoxy resin can enhance the aesthetics and durability of a cutting board, it is best used in conjunction with a suitable food-safe base material like hardwood. This combination ensures a functional and visually appealing cutting board that meets food safety standards.
What kind of resin is used for cutting boards?
When it comes to choosing a resin for cutting boards, it is crucial to select a food-safe resin that complies with health and safety standards. Here are some common types of resins used for cutting boards:
- Food-Grade Epoxy Resin: Food-grade epoxy resins are specifically formulated and certified safe for contact with food. These resins are non-toxic, odorless, and designed to provide a durable and protective surface for cutting boards. They are resistant to staining, easy to clean, and create a glossy finish.
- FDA-Approved Resins: Resins that are approved by the U.S. Food and Drug Administration (FDA) for food contact are suitable for use in cutting boards. These resins have undergone testing to ensure they meet stringent safety standards and do not leach harmful substances into food.
- Polyurethane Resin: Certain polyurethane resins are food-safe and can be used to create a protective coating on cutting boards. These resins provide a clear, hard, and waterproof surface that enhances the durability and aesthetics of the cutting board.
When selecting a resin for your cutting board, always check the product specifications and look for certifications or statements indicating that the resin is food-safe or approved for food contact. It is essential to follow the manufacturer’s instructions for proper usage and curing times to ensure a safe and functional cutting board.
How Do You Make Epoxy Cutting Boards at Home?
Making epoxy cutting boards at home can be a rewarding DIY project. Here’s a step-by-step guide on how to make an epoxy cutting board:
Materials Needed:
- Hardwood board (such as maple or walnut)
- Epoxy resin and hardener (food-safe and appropriate for cutting boards)
- Mixing cups and stirring sticks
- Resin pigments or dyes (optional)
- Heat gun or butane torch
- Sandpaper or sanding block
- Clamps (if needed)
- Protective gloves and safety goggles
- Plastic sheet or drop cloth
Step 1: Prepare the Wood Board
- Select a hardwood board of your desired size and shape for the cutting board.
- Ensure the board is clean, smooth, and free from any defects or rough edges.
- Sand the wood surface using progressively finer grits of sandpaper or a sanding block until smooth.
Step 2: Protect the Work Area
- Cover your work surface with a plastic sheet or drop cloth to protect it from any spills or drips during the epoxy pouring process.
Step 3: Mix the Epoxy Resin
- Follow the manufacturer’s instructions to mix the epoxy resin and hardener in the recommended ratio.
- Stir the mixture thoroughly using a stirring stick, ensuring the resin and hardener are well combined.
Step 4: Add Pigments or Dyes (Optional)
- If desired, add resin pigments or dyes to the mixture to create custom colors or effects.
- Stir the pigments or dyes into the epoxy resin mixture until evenly distributed.
Step 5: Pour the Epoxy Resin
- Slowly pour the epoxy resin mixture onto the prepared wood board, starting from the center and working toward the edges.
- Use a stirring stick or brush to spread the resin evenly over the surface, ensuring complete coverage.
- If using multiple colors or layers, pour and spread each layer before moving on to the next.
Step 6: Remove Air Bubbles
- Use a heat gun or butane torch to carefully pass over the surface of the epoxy resin to remove any air bubbles.
- Move the heat source in a sweeping motion about 6 to 8 inches above the resin surface, being careful not to overheat or scorch the resin.
Step 7: Allow the Epoxy Resin to Cure
- Follow the manufacturer’s instructions regarding the curing time for the epoxy resin.
- Place the cutting board in a dust-free and well-ventilated area to allow the epoxy resin to cure completely. This process usually takes 24 to 48 hours.
Step 8: Sand and Finish
- Once the epoxy resin is fully cured, sand the edges and surface of the cutting board using progressively finer grits of sandpaper until smooth.
- Wipe away any dust or residue with a clean cloth.
Step 9: Apply a Food-Safe Finish (Optional)
- If desired, apply a food-safe finish to the wood portion of the cutting board to enhance its durability and appearance.
- Follow the manufacturer’s instructions for the chosen finish and allow it to dry completely before using the cutting board.
By following these steps, you can create a beautiful and functional epoxy cutting board at home. Remember to prioritize safety by wearing protective gloves and goggles, working in a well-ventilated area, and following the manufacturer’s instructions for the epoxy resin and finishing products. Enjoy the process and relish in the satisfaction of crafting your own personalized cutting board.
Can you cut on a resin cutting board?
While resin is a visually appealing material, it is not recommended to cut directly on a resin cutting board. Resin alone is not as hard or durable as materials like wood or bamboo, which are commonly used for cutting boards. Cutting directly on resin can damage the surface, leaving scratches or marks that may affect its functionality and hygiene.
Resin is often used as a decorative element or as a protective coating on cutting boards made of a suitable food-safe material, such as hardwood. The resin provides a glossy and smooth surface, enhancing the aesthetics and durability of the cutting board. However, it is important to use the resin-coated surface for food preparation, while ensuring the main cutting surface is made of the appropriate material.
To ensure the longevity and functionality of your cutting board, use the resin-coated side for serving or presentation purposes, while using the designated cutting surface, such as wood, for actual cutting and chopping. This helps maintain the integrity of the board and promotes food safety.
Always follow the manufacturer’s instructions and recommendations for the specific cutting board you have, as different materials and designs may have varying guidelines. Proper care and maintenance, including regular cleaning and oiling, will help keep your cutting board in excellent condition and extend its lifespan.
Conclusion
If you’re looking for a unique and interesting cutting board, you can make your own resin cutting board. Resin is a material that can be molded and shaped, and it’s also heat-resistant, making it ideal for a cutting board. You can find resin at your local hardware store, and it’s relatively easy to work with.
To make a resin cutting board, you’ll need a mold, resin, and hardener. You can use any mold you like, but it’s important to make sure that it’s heat-resistant. Once you have your mold, mix the resin and hardener together according to the instructions on the package.
Once the mixture is ready, pour it into the mold and let it set. Once the resin has hardened, you can remove the cutting board from the mold and start using it. Resin cutting boards are durable and easy to clean, and they make a great addition to any kitchen.